Using a domain key (similar to DKIM) helps protect the content of your message between sending by JangoMail and receiving by your recipient.
The steps below use GoDaddy as the hosting provider. If not using GoDaddy, the exact steps to get your domain’s DNS editor or control panel will no doubt differ, but overall, you have some means of making or editing entries in your DNS settings. A control panel/interface named cPanel is commonly used, so if you’re not sure where to start and you see cPanel, that will be your entry point into editing your DNS settings. From there, you would look for something like a zone editor.
Note: There are a few providers who use their own custom editor interface, so if you can’t figure out where to go, contact Support and we’ll help you with the edits. And not to complicate matters, but there are some providers who don’t allow you to add a TXT record, and if you find that’s the case, you’ll have to contact support at your provider (or put us in touch with your point of contact).
The image below is from a cPanel layout (HostMonster, as an example, uses this).

When everything is finished (including adding an SPF record), the entries should look like this (the basic information shown, not necessarily this exact layout):

Our example provider: Using GoDaddy as an example, where you have already gone into your JangoMail/JangoSMTP account and generated a new domain key in the Settings > Sending and Receiving section – view the key settings of your key and copy the key value into your clipboard via Ctrl-C so you can paste in later within your zone editor.

In new window/tab that appears in your browser, copy the entirety of the “Value” field:

For GoDaddy – Logon to your account, go to Visit My Account, go to Domains, expand the section as needed to find your domain, and click the Launch button. Or, click Launch and then click the link for your domain of interest.

On the Domain Details page, select the DNS Zone File tab.

You can click the “Use Classic DNS Manager” link if you want. Otherwise, to add a new record, click on Add Record:

In the popup window, select TXT record.

In the following window, enter the selector value in the Host field, and paste in the key from your JangoMail/JangoSMTP account:

In this example, the selector value I created/entered in my JangoMail account was jm. The host value entry is then:
jm._domainkey
Paste in the “k=rsa…” key value in the TXT Value column (this is all one line, the line wrapping is because of formatting on the web page).
The TXT value that is pasted in:
k=rsa; p=MIGfMA0GCSqGSIb3DQEBAQUAA4GNADCBiQKBgQDBV4zvxvMyBy/UU3qbJ8t9v2DLDfCcvC567yd+jyywEJoF2jNIpRsrmyN199a1fjj7eKwVq4fdgJrqaq0DPDkMqAuPfSzwIzE5CeEozWxWcSgjZvajr7Rm+FVcmdAqBIkeW49xv+5F7g6BWTc6TxnmanbNpsvrs2p5vsTF8Tq/kwIDAQAB
From here, you can click Finish (you can continue to add other records, but to make it simple, this example is just one at a time).
Click Save Changes in the red action bar that appears back out on the main page:

You will see a popup message about the setting taking anywhere from an hour to 48 hours, but the results can usually be seen right away in various online testing tools/websites (e.g., network-tools.com).
In the new editor layout, the entry looks like this:

In the Classic editor, it looks like this (the second line):

Go back into your account and enable the key (click the icon the arrow is pointing to), and if successful, you’ll see a blue checkmark for the status and a “Domain key enabled” message at the top of that popup alerting you to the status.

That’s it (well, almost, see #3 below). When you send an email/campaign from your account, and you use the domain name in your FROM address, the domain key part is added behind the scenes. There’s nothing you need to do to use the key.
Additional information
1. If you are using a subdomain name for your FROM address, then your host value is (using “jm” as an example of a selector, and “news” as my subdomain name):
jm._domainkey.news
2. When you create your domain key in JangoMail, only use the domain name. Your domain name does not include www. That is part of a website address/URL. The image below shows a variety of selector names being used across multiple domains. Note that you do not see any “www.whatever.com” names as the domain name value. You do see a subdomain of news, but no www.

3. The history behind a domain key and DKIM (domain key identified message) includes Yahoo, and what Yahoo asks you to do is have a postmaster @ your_domain_name email address. Once you enable a domain key, our system automatically sends a notification to Yahoo, who in turn will send a message to your postmaster address. There will be a link to click to verify receipt. Yahoo uses the domain key for its feedback loop with us, where a feedback loop (used by many major email providers) allows a recipient to be automatically unsubscribed from your account whenever the recipient marks your message as spam or junk.
What if you don’t have a postmaster address or cannot create one? No big deal if your Yahoo recipients are truly opted-in, but it definitely helps to have this step completed with Yahoo as it helps establish the credibility of your domain name when it is used for sending via an email service provider. When you start seeing “domain is blocking” and “TS01” (or worse, TS02/TS03 diagnostic codes) due to Yahoo saying too many user complaints, having the feedback loop in place with Yahoo helps us and you identify list/sending issues.
Example domain
Using a domain named jangodemo.com, you can see the DNS values at network-tools.com (select the DNS Records radio button, enter jangodemo.com, and click Go, or use this link).
You can see the SPF record (the TXT entry) with include:jangomail.com. The domain key uses jango as the selector value, so if you enter jango._domainkey.jangodemo.com, you’ll see the key value, or you can use this link.
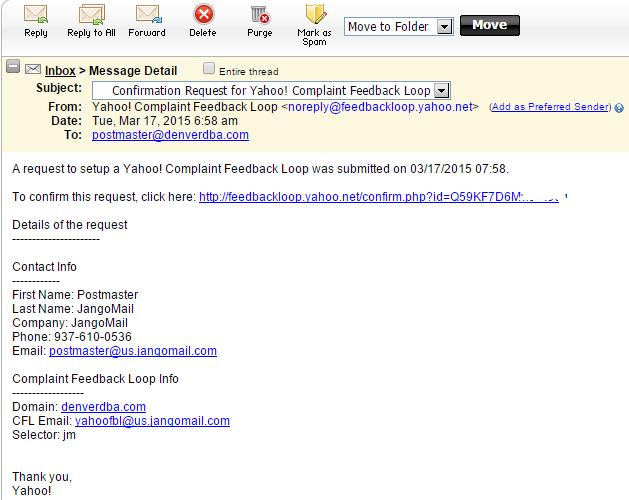
What to expect from Yahoo
At your postmaster @ your_domain address, you’ll receive a message similar to what is shown below:
Click the link in the message to complete the process. You’ll then see a confirmation page.